Understanding automation conditions
Automations are triggered based on conditions, and those conditions can be singular or multiple depending on the user's needs. This article explores the various conditions that can be used to trigger automations.
1. Message Type
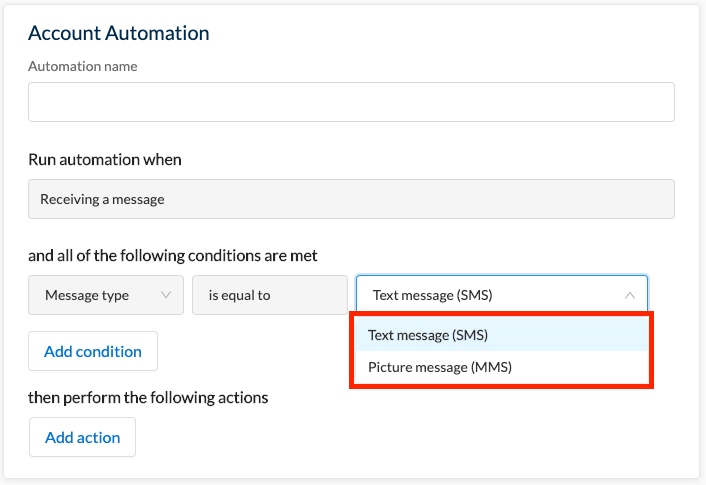
The first condition is "hard-coded" (i.e. it cannot be changed) to "Message Type" because all automations are triggered by an inbound message. It is possible, however, to change the message type - either SMS or MMS:

A good example of using MMS as the trigger might be a retailer using automations to trigger a damaged goods return flow - whereby a customer sends an image of a damaged product to trigger a workflow to manage the return process.
2. Receiving Number
You can limit the automation to apply to one or more of the dedicated numbers on your account (if you have any set up), or any of your numbers:

Or

This allows you to isolate your automation so that it won't trigger unless recipients respond to messages sent from a nominated number on your account. This also means you can run multiple automations that utilise the same keywords but apply to different receiving numbers, so that they don't interfere with each other.
3. Message Content
Here is where you can set your keywords by either inclusion, exclusion, or message preface. Basically this means that you can trigger your automation if:
- A message contains a specific keyword (or any of a list of predefined keywords)
- A message contains all of a set of predefined keywords
- A message does not contain a specific keyword (or any of a predefined list of keywords)
- A message does not contain all keywords in a predefined list
- A message begins with a specific keyword

4. Date & Time received
You can restrict the timing of the automation by setting a date and time window during which messages must be received in order to trigger the automation, or a start or finish point for the automation:

You do not have to set all of the above conditions for your automation except for message type, and you can remove a condition by clicking on the dustbin icon next to each condition:

This is especially useful if you are using automations to run a timed campaign such as a registration for an event or program, or you are looking to forward responses to email or mobile after office hours.
