Adding and managing users
Adding users to your account enables other members of your organisation to log in with their own credentials instead of having to share yours. The use of User roles also enables you to limit users to certain activities, helping you to retain control over your account and to ensure consistency throughout the messages being sent by your brand or company.
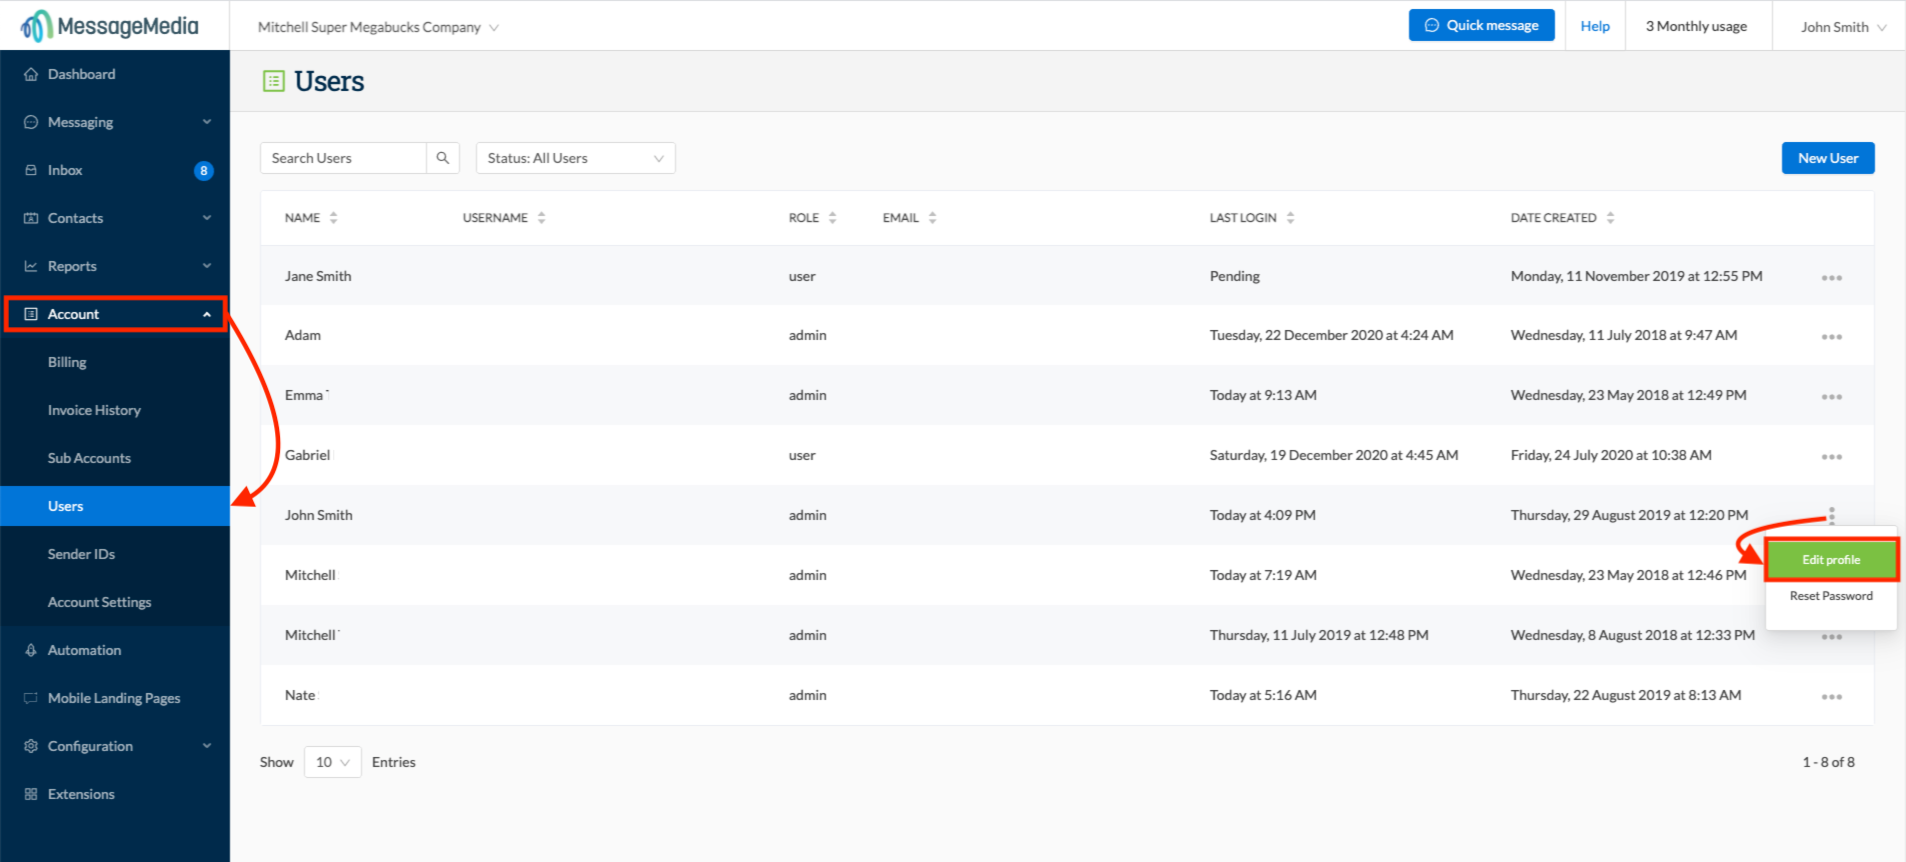
Go to Account > Users to view a table of users with access to the account to which you are currently logged in.
The table displays the following information:
- Name - the name of the user
- Role - admin/user
- Email - email address of the user which is used to login
- Last Login - timestamp denoting the last time the user logged in
- Date Created - timestamp denoting the date that the user was created
- Action - providing the ability for an admin to change the password or remove the user
Inviting a new User to an account
As an account administrator, you can invite new users and assign them roles
- Go to Account > Users
- Click on New User

In the New user detail screen:
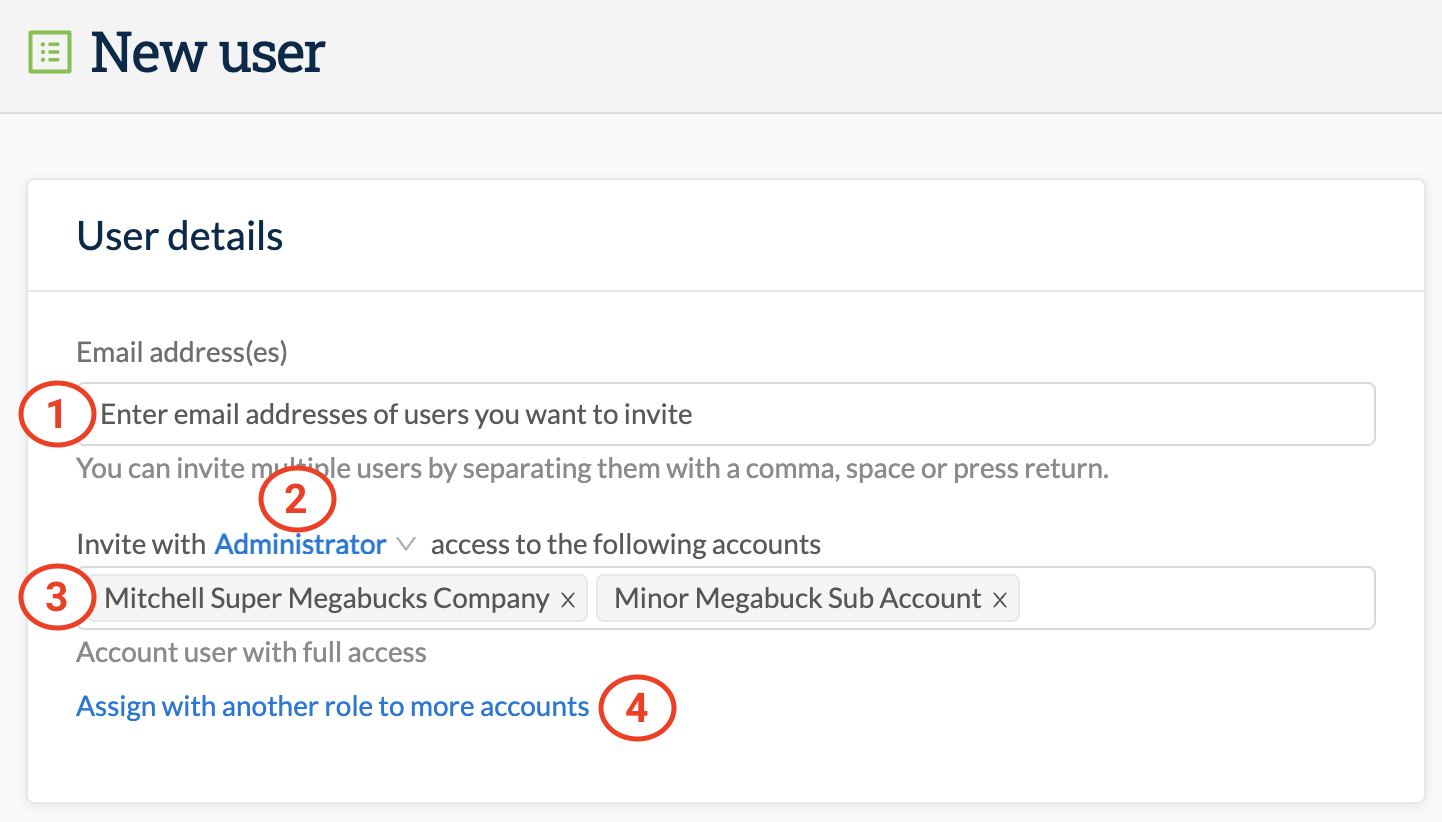
1. Insert the email address(es) of the user(s) you wish to invite
2. Provide a role by clicking on the text in blue:
- Administrator - full access
- Advanced User (default) - has full access except billing, user management, and account configuration
- Basic User - has restricted access - cannot view other user's messages, edit contacts, edit templates or export resources
3. List the accounts to which you want the new user to have access
- This option is only available if you are working from an account that has sub-accounts attached to it, otherwise the account is set by default as the account from which the invite is being sent
- If your account has multiple sub-accounts and grandchild accounts (e.g. Level 2, 3, 4, 5 sub-accounts), you can select one or more of these accounts for the user to access
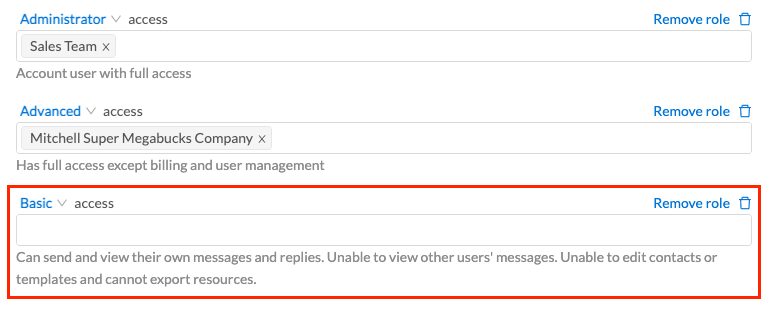
4. Decide whether you wish to add this user to other accounts but with a different role:
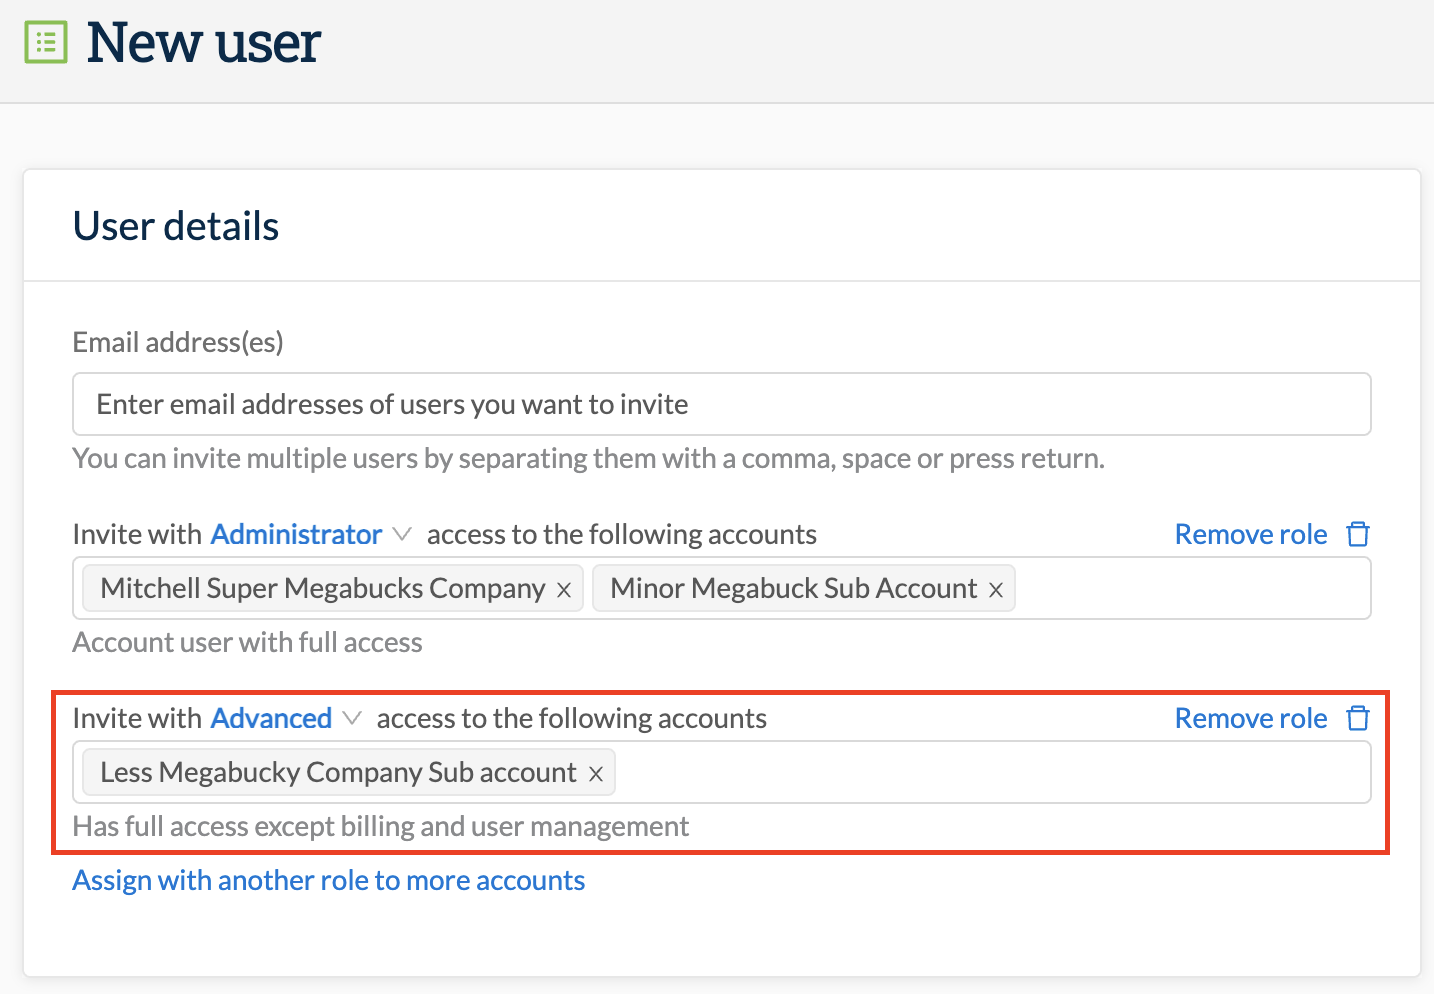
For example, you may want the new user to have restricted access on the parent account (by assigning their role as "Basic user") but to have admin rights on one or more sub-accounts.
Click Send Invitation in the bottom right corner of the screen.
An email invitation is sent to each of the recipients detailing the account(s) to which you are providing access, including the URL and email address they should use to login. The user must click the 'Accept Invitation Now' link contained within the email to register successfully. A user is marked as Pending in the Users table until they accept the invitation, create their profile and login for the first time.

Switching between accounts
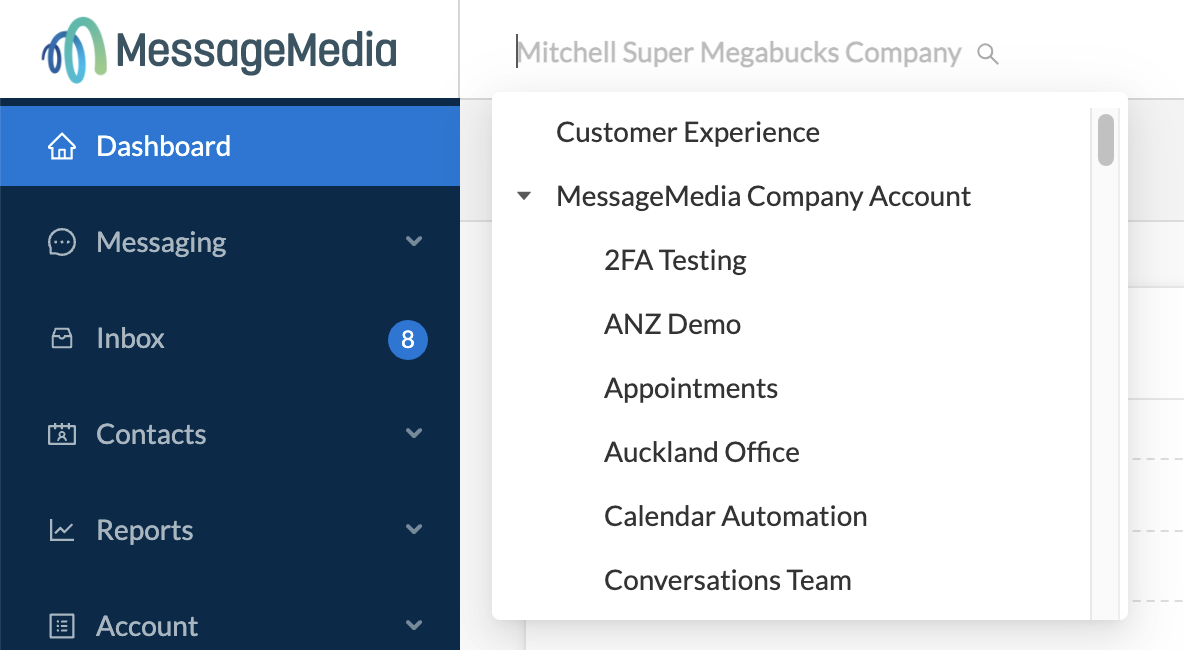
Users with access to multiple accounts can access the accounts from the account-switcher menu located in the header bar of the Hub:
Editing an existing User's Role
It's possible to change a User's role after they've joined an account. Roles can be increased or decreased depending on requirements.
Go to Account and then Users, and alongside the user you wish to upgrade, click on the ellipses (three dots) and select Edit profile:
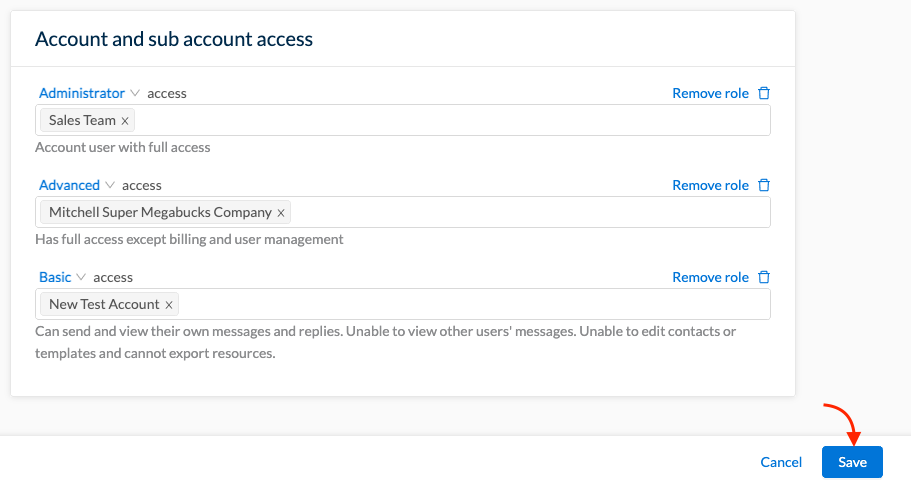
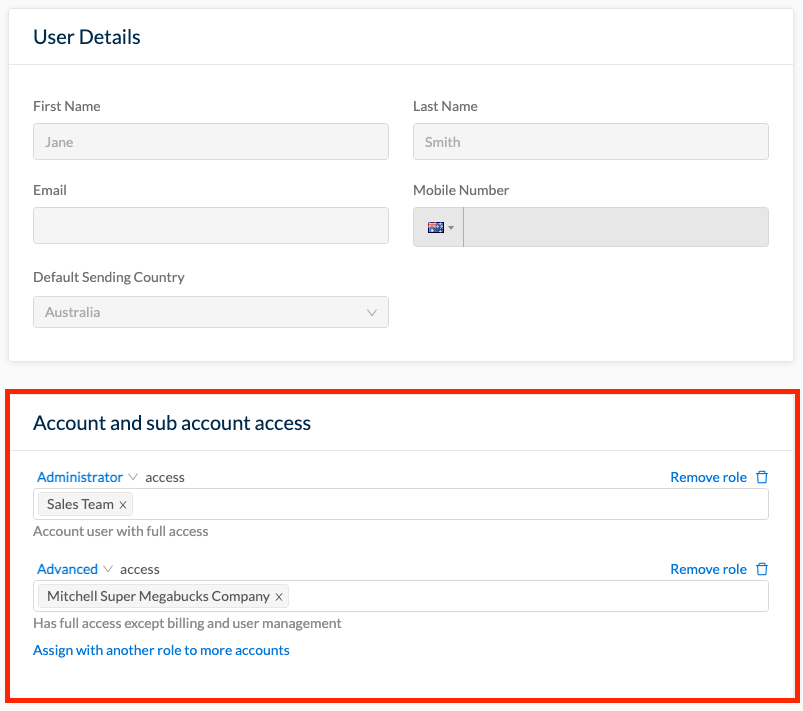
In the following screen, look at the Account and sub account access section, where you will see the accounts and sub-accounts to which the user has access:
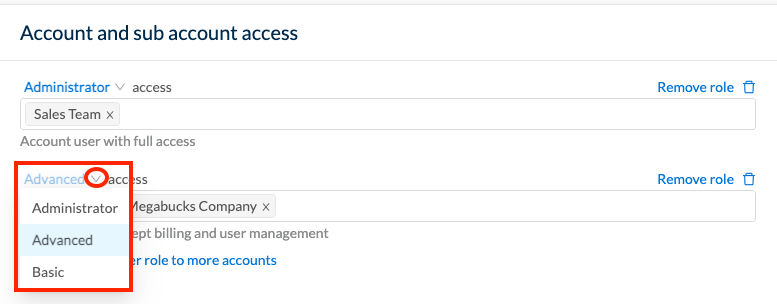
Click on the down arrow next to the current access level in the account for which you want to amend the user's role, and then select the required role from the resulting drop-down menu:
You can also remove a user's access to specific accounts or sub accounts by clicking on Remove role on the right hand side of the relevant account item
Adding an existing User to additional accounts
You can add existing users to additional accounts by selecting "Assign with another role to more accounts" in the Account and sub account access section of the User profile screen:
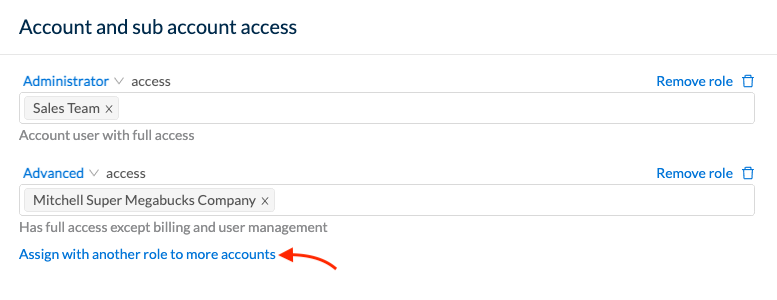
Enter the account name to which you wish to add this user, and select a role by clicking on the current role (highlighted in blue) and selecting the required role from the resulting menu:
When you have finished assigning, click on Save in the bottom right of the screen:
