Dedicated Numbers
A dedicated number (also known as a virtual or static number) allows you to send from, and receive into, the same number. A recipient can save the number in their phone and, as a result, know who future messages are coming from.
If you have recently had dedicated number functionality enabled on your account, you can now choose your own number:
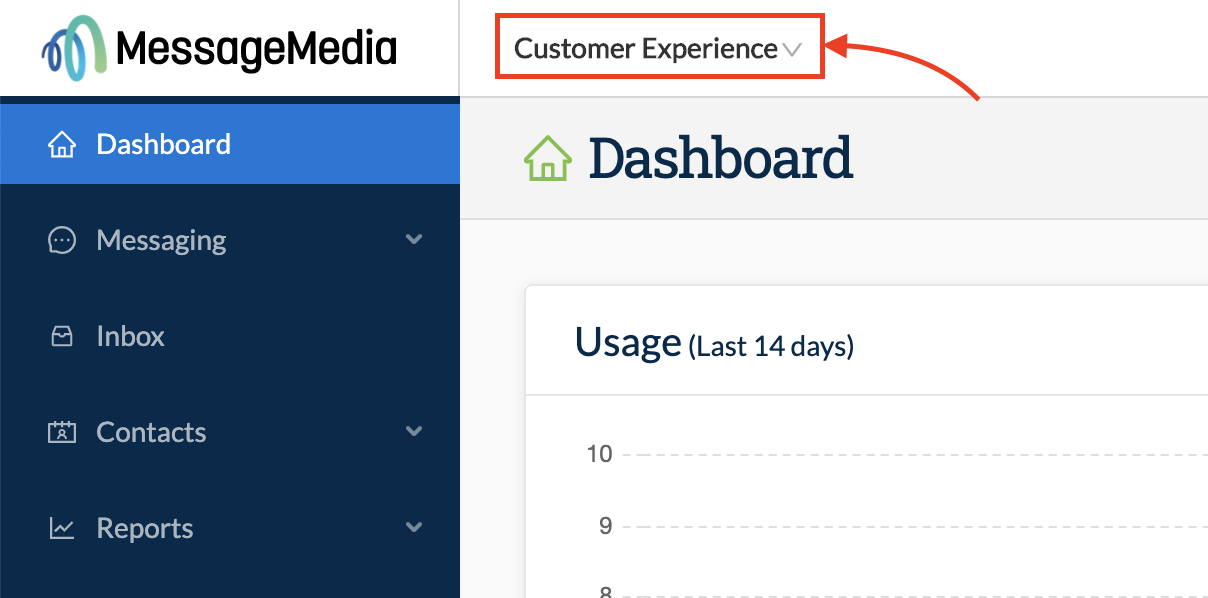
1. First, ensure you are logged in to the parent account. Click your account name in the top left-hand corner and then choose the top option, which is your parent account name:
2. Go to Account > Sender IDs: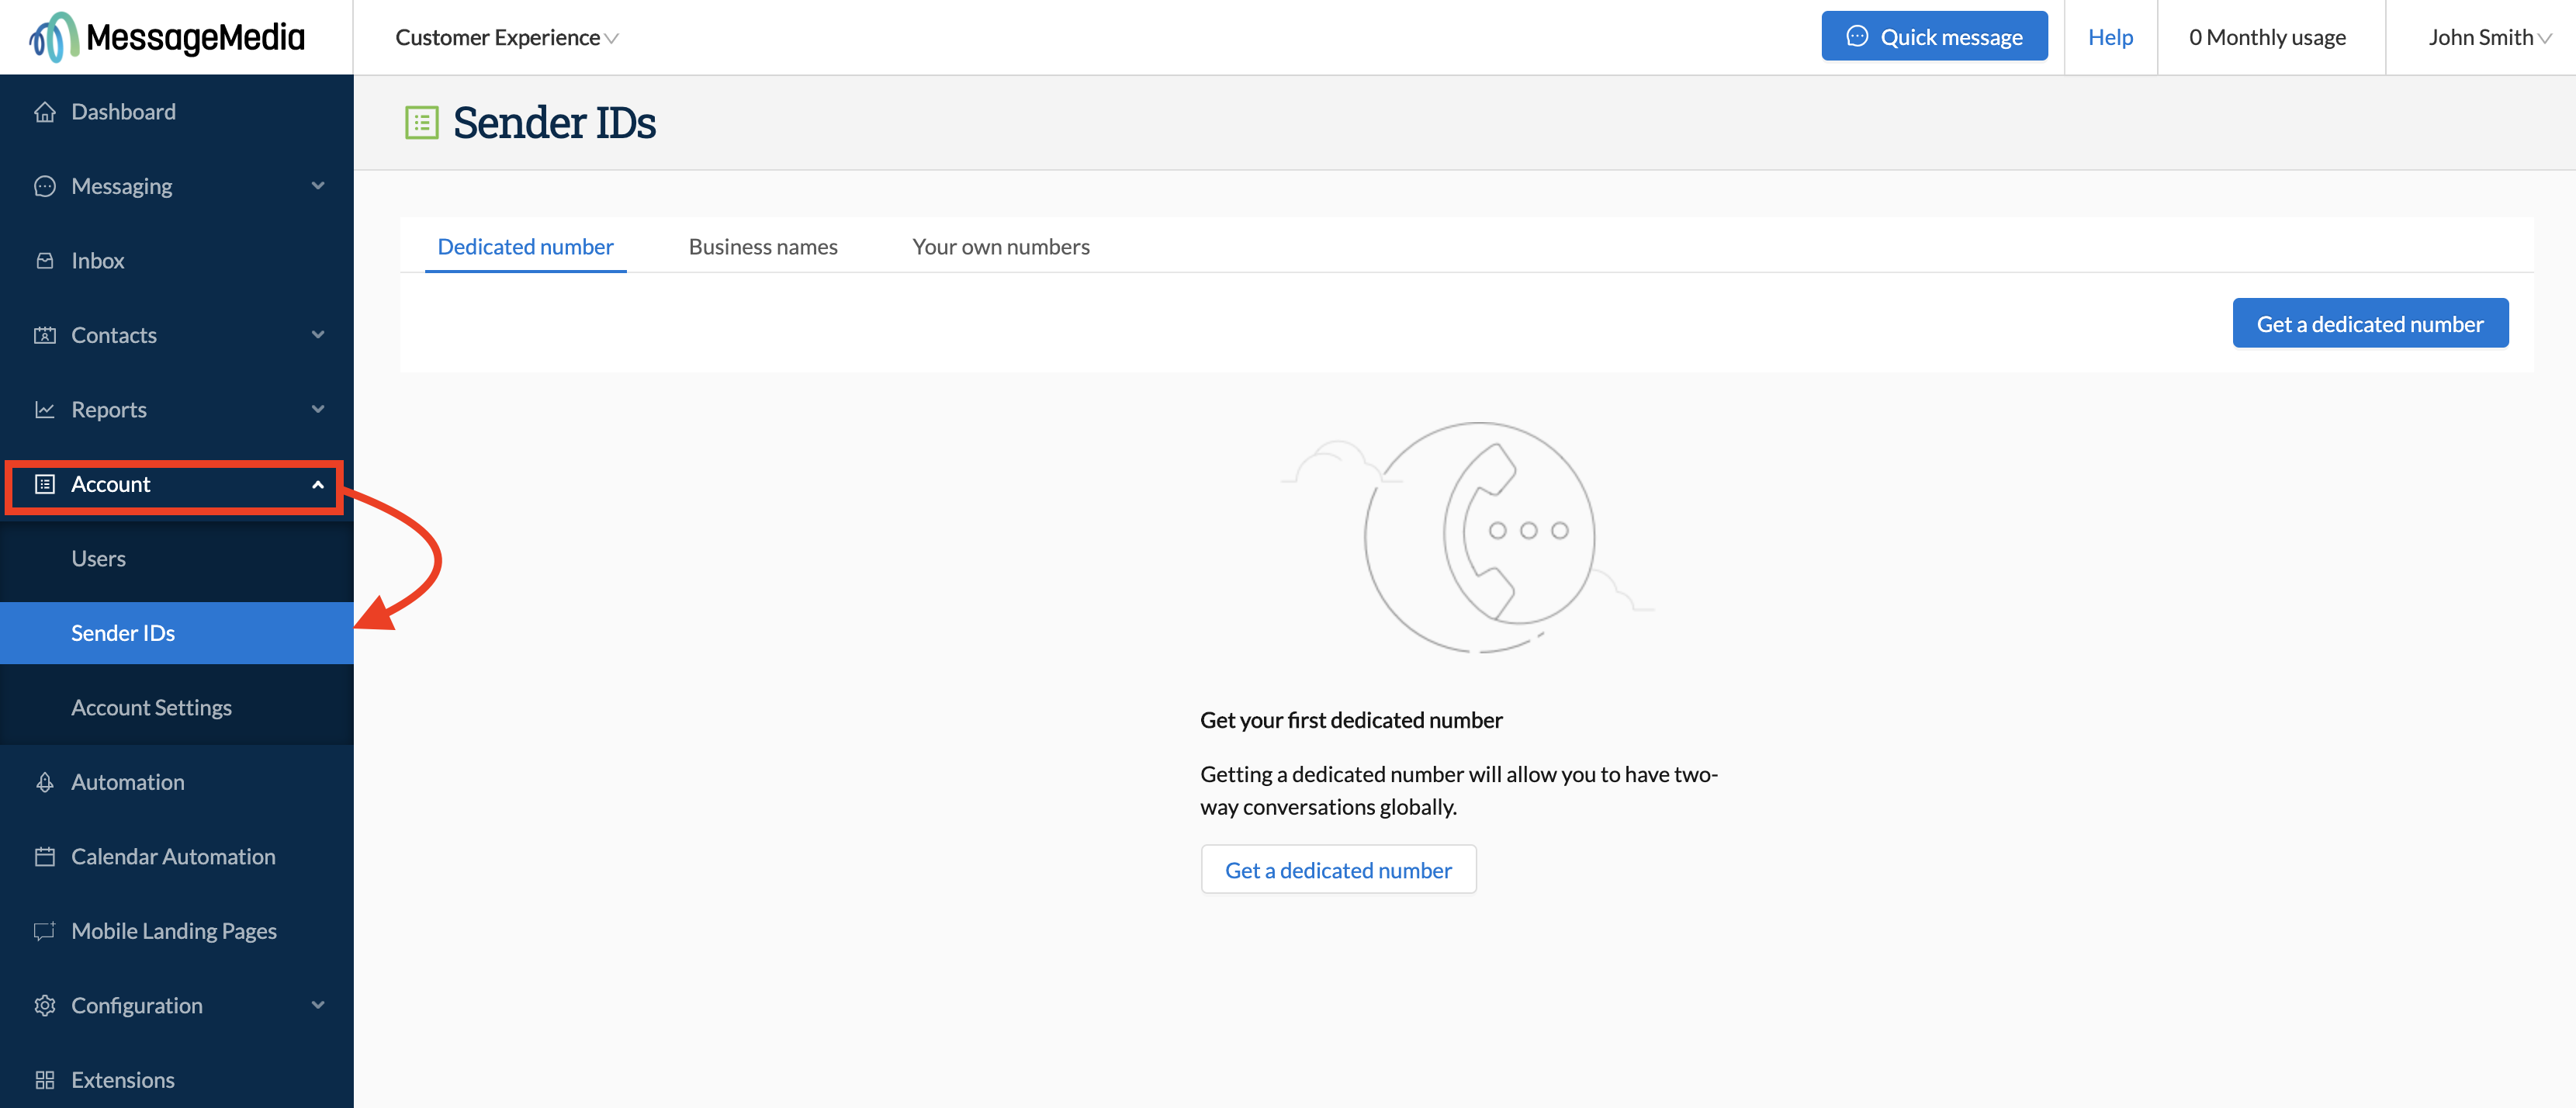
3. Click on the Dedicated Number tab, and then click Get a dedicated number: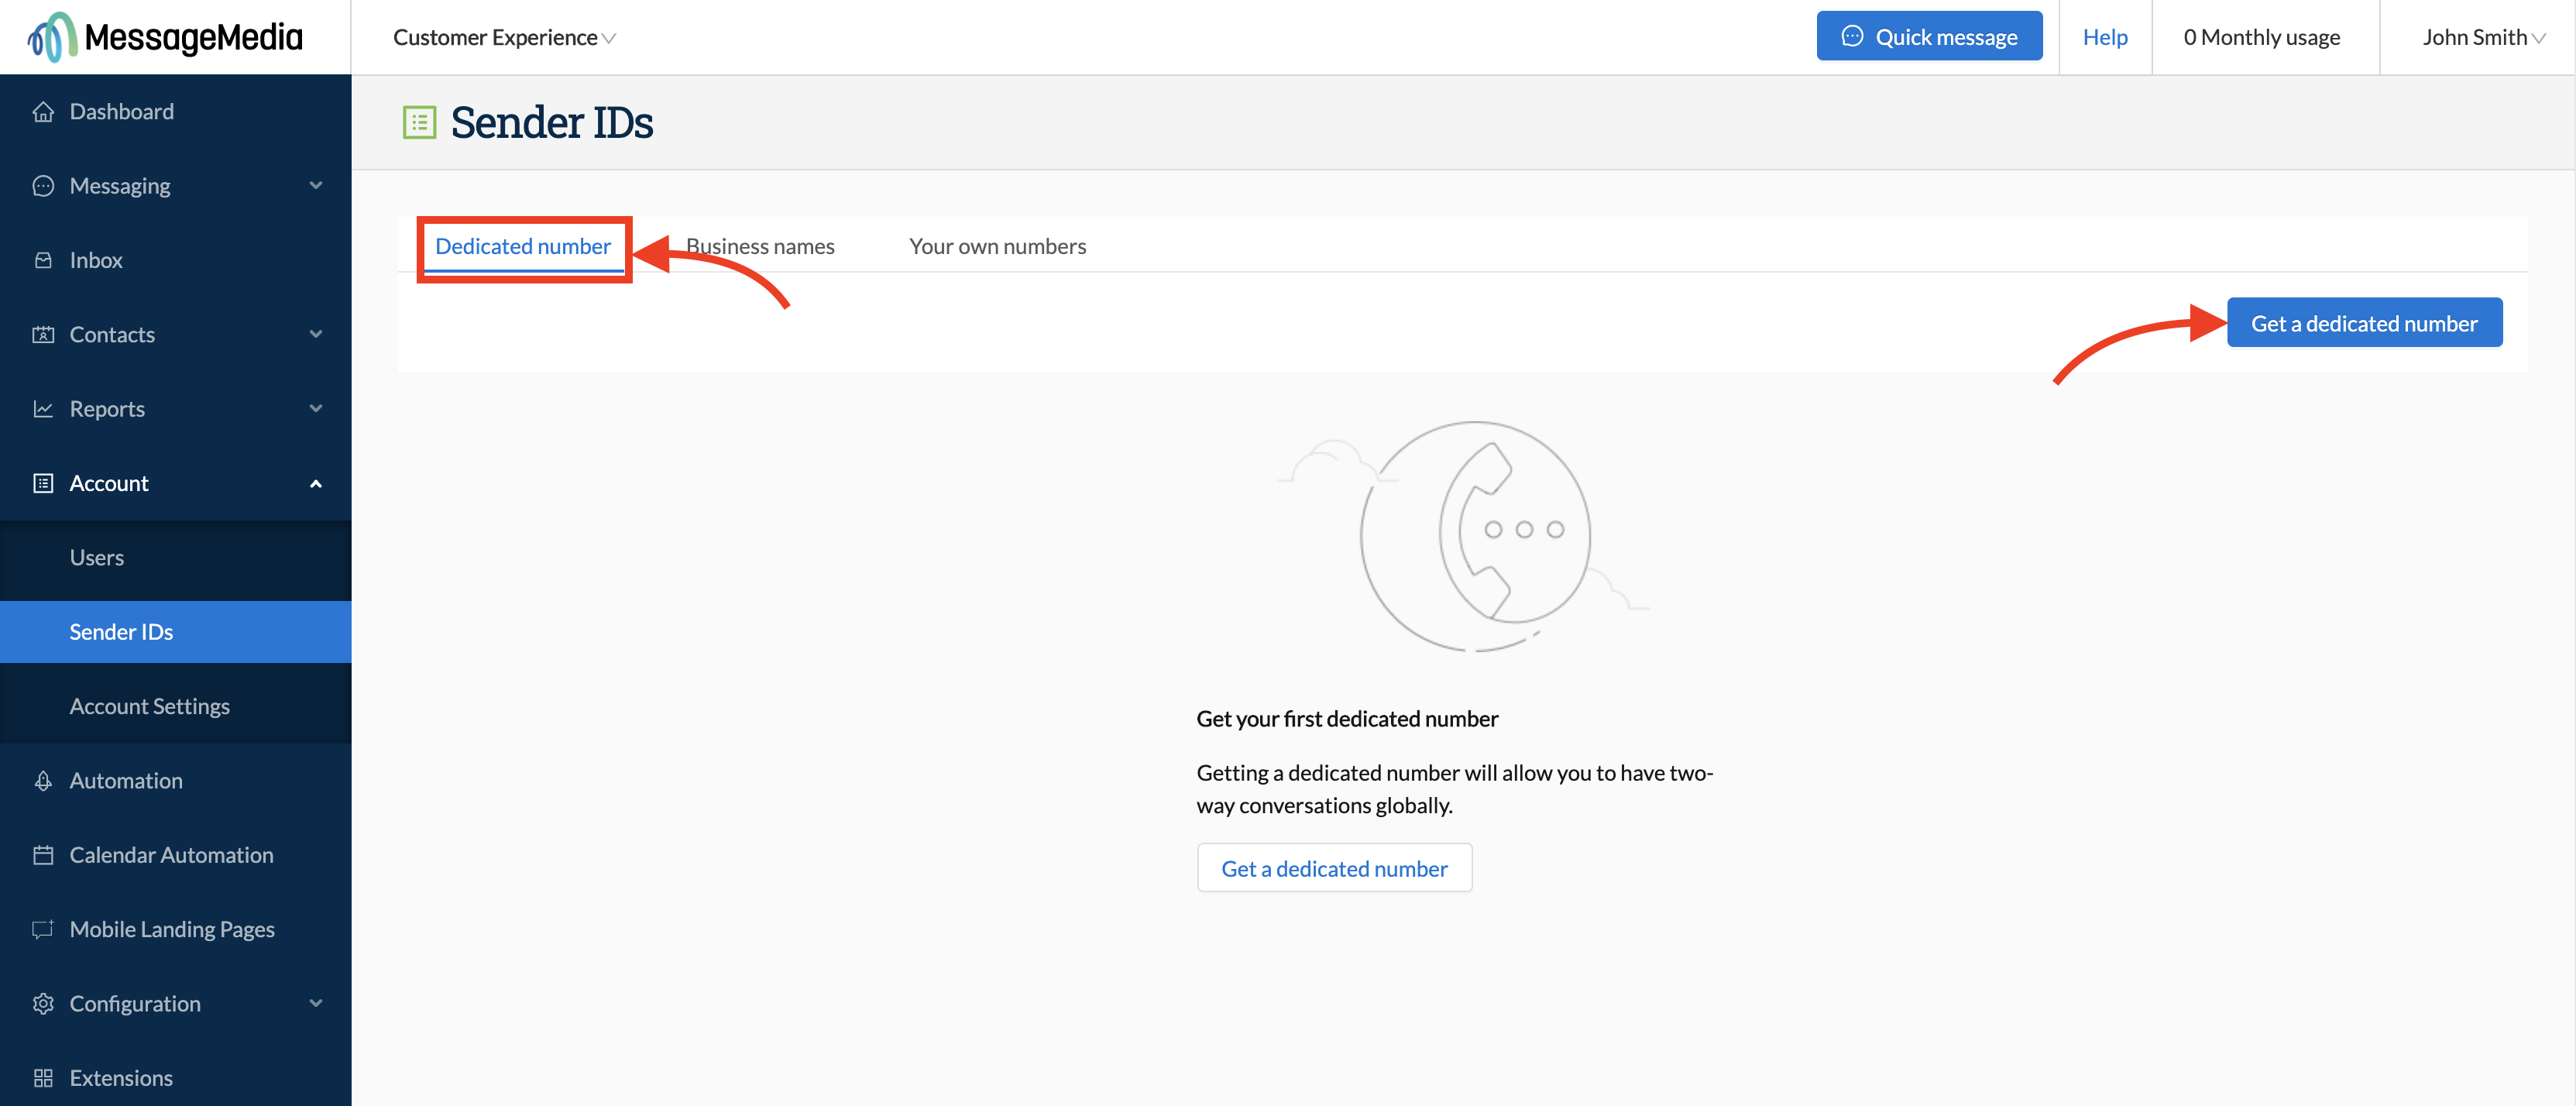
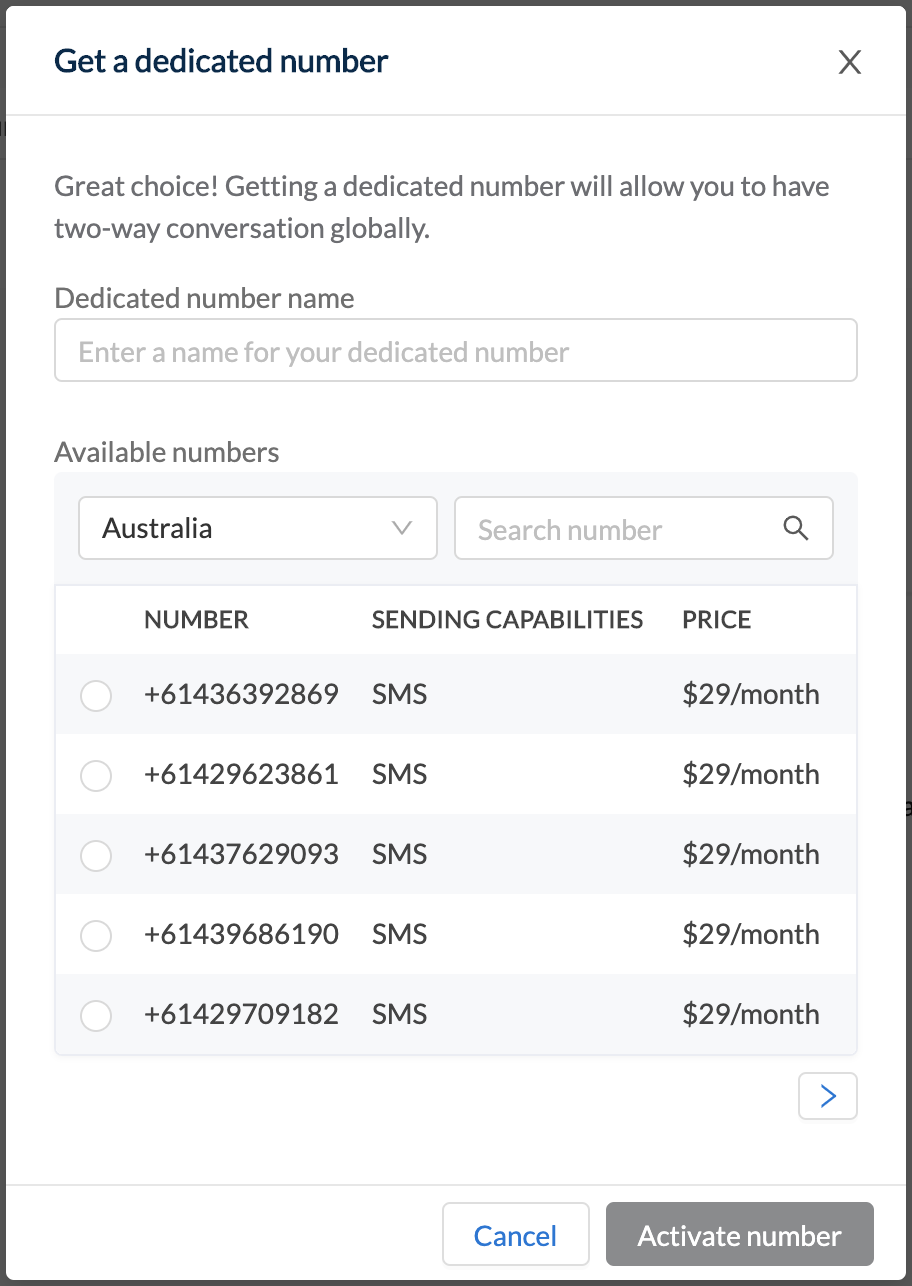
4. Select your preferred number from the list in the resulting popup, and then click Activate number:
Setting your default sender ID to your dedicated number
Once your dedicated number is activated, you have the option of setting your default sender ID, so that all future messages are sent from this number unless otherwise configured during the message building process.
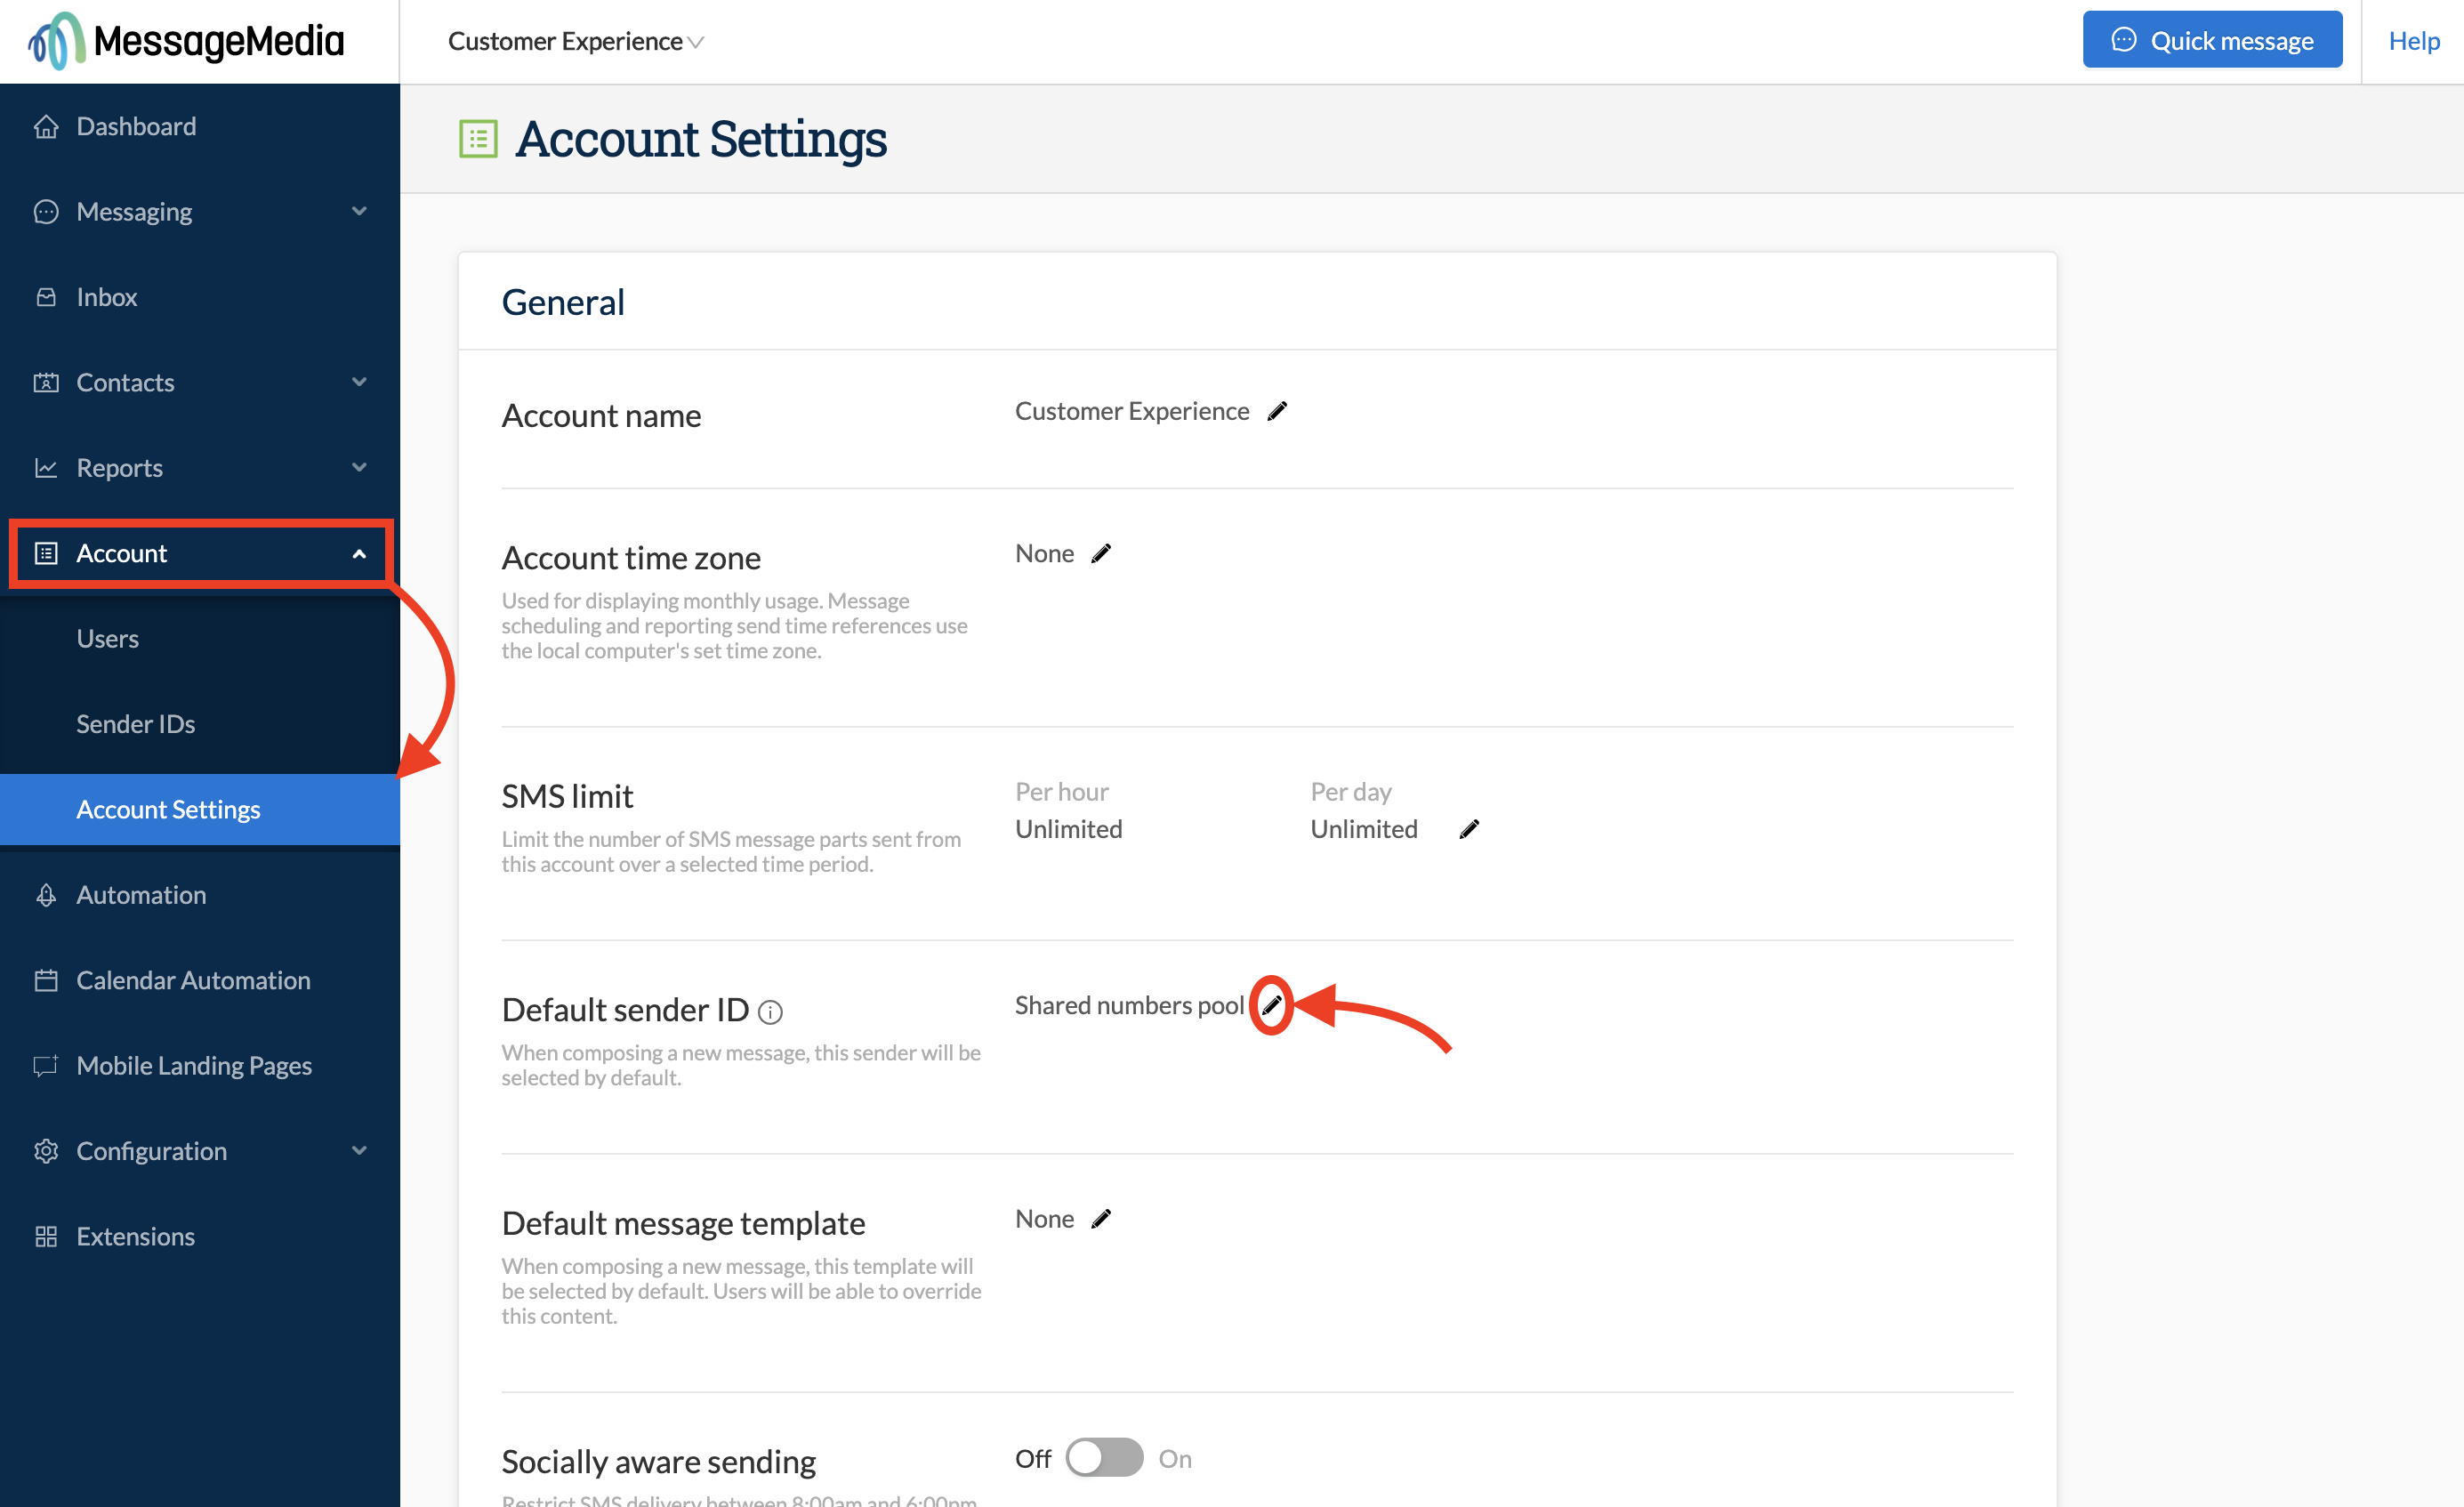
1. Go to Account and then Account Settings, and then click on the edit icon next to Default sender ID:
2. Select your dedicated number from the resulting drop-down menu and click Save
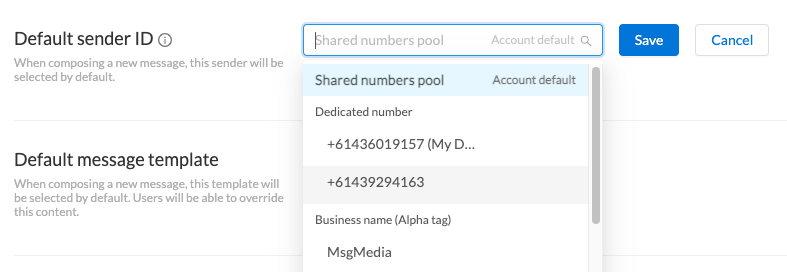
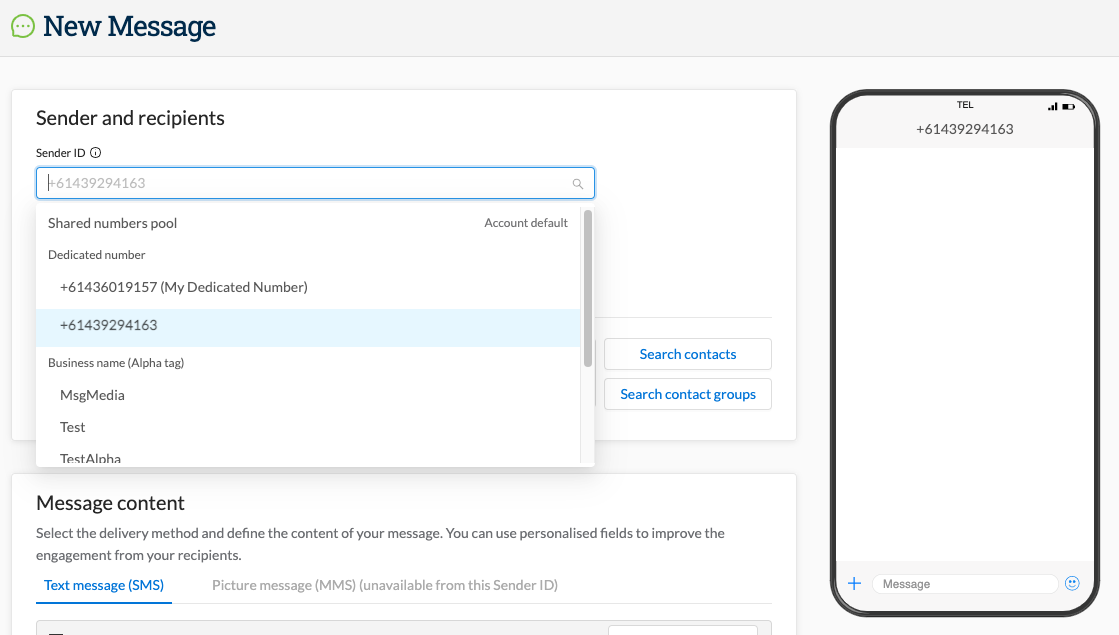
The Sender ID will now be set to your dedicated number by default whenever you start to create a new message. You can change this to an alternative sender ID for individual messages if preferred by selecting a sender ID from the list at the top of the New Message page:
